Intro to Custom Timelines in Twitter (+Tweetdeck)

In this article, we’ll explain and introduce you to Twitter’s custom timeline functionality. Custom timelines are a way for you to organize your twitter timeline into specific themes or topics that you choose instead of having a general timeline with everything. It’s a great way to focus a specific topic while sharing and growing an idea or subject.

In order to create and work with custom timelines you will need to use Twitter’s Tweetdeck:

Steps to add a new timeline

a. Login to Tweetdeck

Go to tweetdeck.com and login

tweetdeck

b. Add new timeline

Go to the left hand navigation, click on the “+” sign and click on “custom timeline” and “Create new” or edit existing.
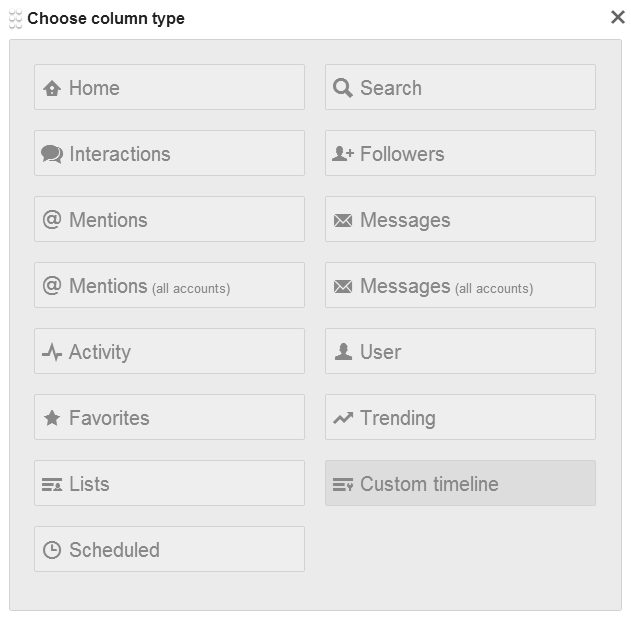
custom-timeline

Name your custom timeline in box and add description

name-timeline

How to add tweets to timeline

option a – hover over desired tweet over arrow icon and drag to custom timeline.

option b – hover over desired tweet, click on “more” button and “add to custom timeline”, then checkbox the desired custom timeline name.
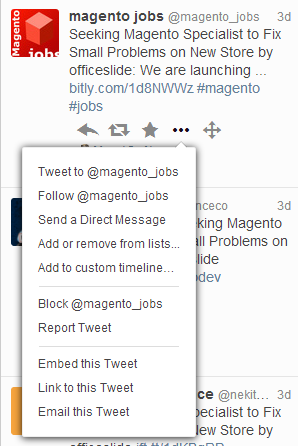
add-to-timeline

How to share custom timeline

In order to share custom timeline, click on share button. You can do the following:

a. Embed on website

Customize widget and copy and paste code into your website or blog
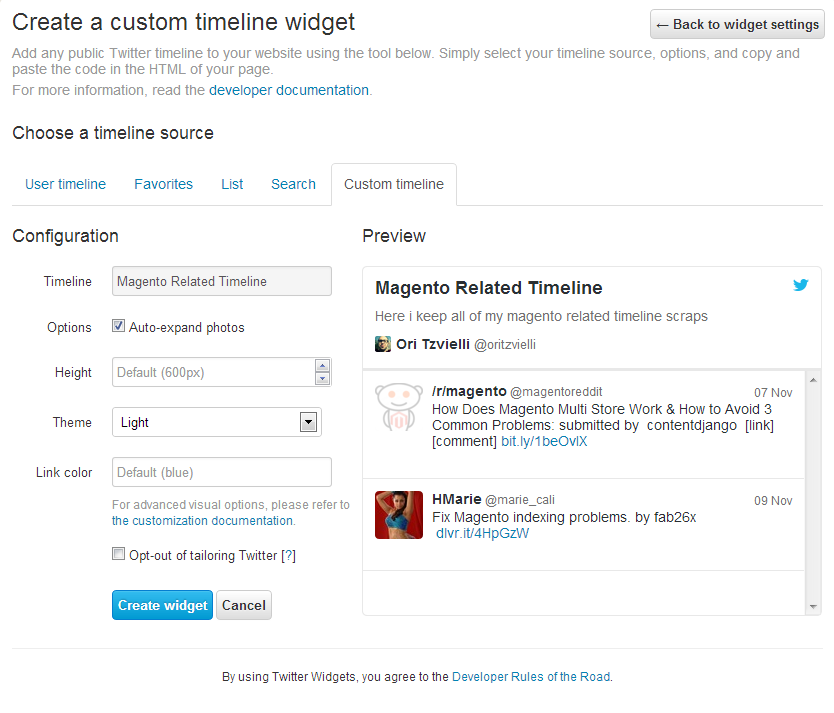
embed-timeline

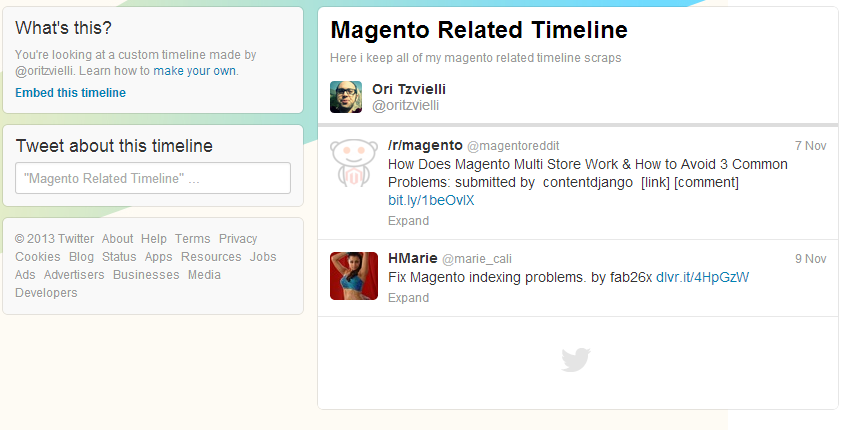
b. See on twitter.com and copy url

view-timeline-twitter

* also can get embed code from twitter page

c. Tweet about timeline

tweet-about-timeline

That’s it. Let us know if you have any questions. We’ll be happy to help!

How to run Analytics Experiments (A/B Testing) on WordPress

In our daily marketing scramble, we many times forget the importance of conversions and conversion rate and only focus on gaining new customerss. Due to this fact, we have setup in our own company a policy of always running tests on our clients’ websites.

a-b-testing-experiments

We have included below a simple step by step guide on how to setup A/B testing using WordPress and Google Analytics Experiments.

Step 1 – Business Goals

a. Think about what are your core conversions are (purchase of product, form filled out, newsletter joined, commented on blog, etc)

b. Define a goal in Analytics
If you have not defined a goal in analytics, see our analytics goals article

Step 2 – Define Experiment

Create variation page in wordpress by visiting the “Pages” -> Add New. Create your new variation page with the specific element you want to test and publish. Try not to test out too many changes on your pages.

add-new-page

* don’t forget to note the live url for later.

url-of-page

Step 3 – Setup Experiment in Analytics

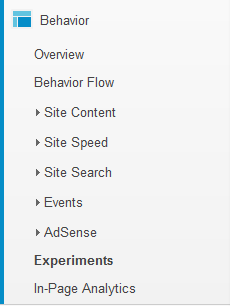
Visit the Behavior -> Experiments page:

behavoir-experiments

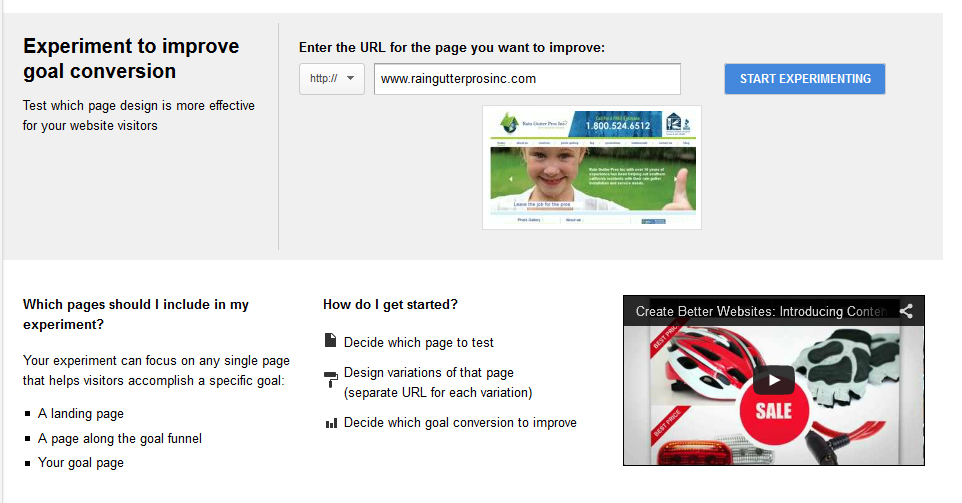
a. Enter original page you want to test against (and click on start experiment)

start-experiment

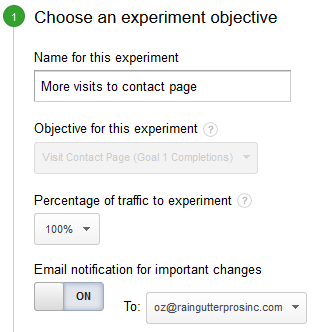
b. Setup settings for Experiment

– name
– objective
– % of traffic to experiment on
– email notifications

step1-experiments

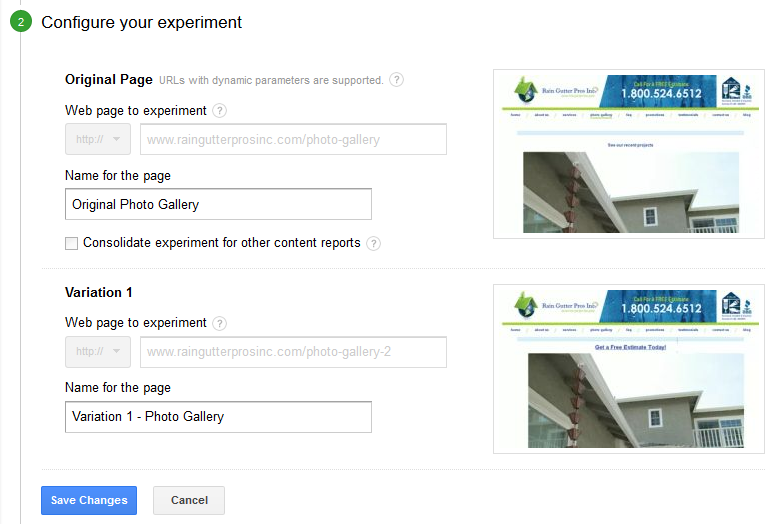
c. Enter URL of Variation Page

* you can add more than one variation if desired
* check previews to make sure you are defining the correct pages

step2-experiments

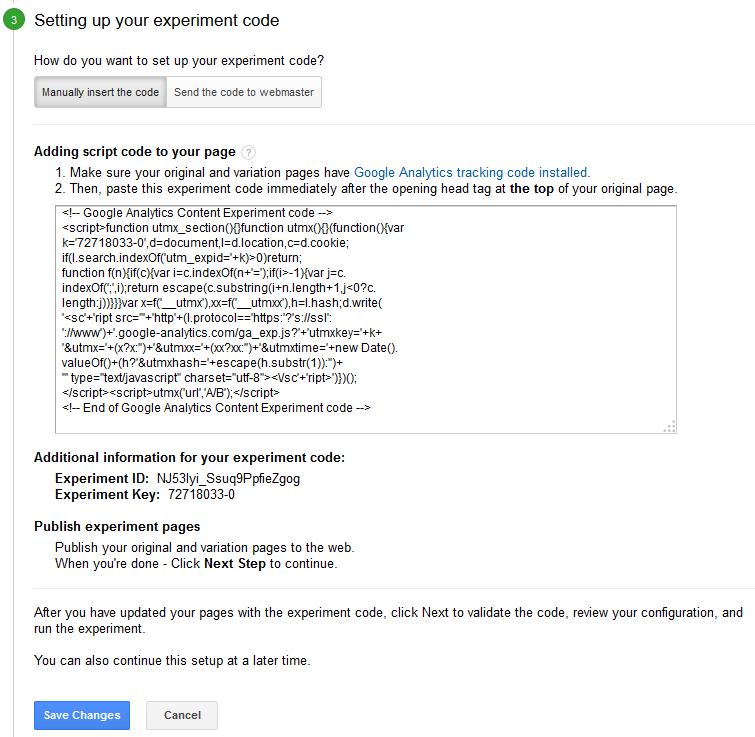
d. Add code to site pages

step3-experiments

You will need to add the correct analytics code to begin your experiment. Follow the instructions below to proceed:

1. all pages must have analytics tracking code
2. the original page has to include additional code

Use the following format:

<?php if (is_page('') ):?>

<?php endif; ?>

Find the original page. edit the page in wordpress and look at url
“post=x” -> take the number and add to our code:


<?php if (is_page('x') ):?>

<?php endif; ?>

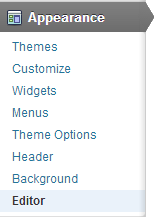
b. go to appearance -> editor -> header.php and paste the code with analytics
extra code right after the <head> tag and click on “update file”.

wordpress appearance editor


<?php if (is_page('') ):?>
xxxxxxxxxxxxxxx
xxxxxxxxxxxxxxx
xxxxxxxxxxxxxxx
<?php endif; ?>

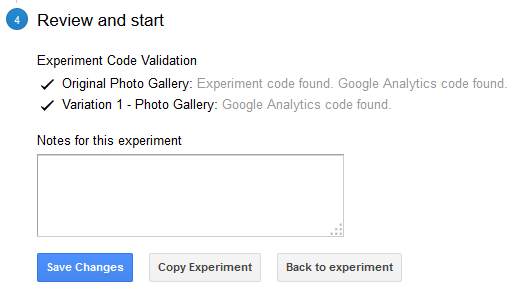
Step 4 – Complete and set experiment live

Verify that you have two check marks underneath “Experiment Code Validation” and click on “start experiment”

step4-experiments

That’s it! Let us know if you have any questions with A/B testing. We’ll be happy to answer your questions.